Wednesday, July 31, 2013

Orchid petals

I am not fond of couching wires for stumpwork. The instructions called for couching the wire around a satin ribbon, and then cutting the petal out without any further stitching. I decided to use a purple silk fabric instead of the satin ribbon. However the silk fabric looks too dull, so I am stitching the petals instead.
These are the 5 petals for one flower.

Monday, July 29, 2013

Orchid leaves and buds

The big leaf and buds are done. I used the blister effect technique for the buds instead of felt padding.


The detached leaf is couched around wire. I took apart the wire bundle in an old lamp cord and these individual wires are just the right size to use in stumpwork.

The detached leaf is added.

Thursday, July 25, 2013

Orchid Stem and Leaves

The stem has a very nice curve, and the leaves are padded with felt. The roots look nice too. The big leaf will be filled with long-and-short stitches next.


Tuesday, July 23, 2013

Moth Orchid

I decided to take a break from Camellia and work on a piece I got several years ago. It is a stump piece called Moth Orchid  from Luan Callery. When I ordered it I was just starting to do stumpwork, and I didn't feel I was ready to tackle it. I think I'm much more able to do this now. Also I got to try two new toys that I recently ordered. The first is the Pilot Frixion pen; the second is the mini hair straightener as suggested by Lois Kershner during the class I recently took with her.


For the backing I use a leftover upholstery fabric. It is cotton with a nice woven design. I traced the design using the Frixion pen. I tested it out and sure enough - the lines totally disappear when I hold a hot iron close to it. Very neat!
Then I straighten out the DMC thread using the hair straightener before I stitch with it. I don't know if it made much difference, but it was fun anyway.
Today's progress - the orchid stem:


Monday, July 22, 2013

Camellia flower

I fixed the sawtooth with half a strand of red and it turned out ok. I (almost) finished one camellia. The karayori pistils are left, which I'll leave for later.


I must see if there is something else I can work on concurrently, to relieve the pain I'm feeling with this piece!

Monday, July 15, 2013

Camellia, Summer Hydrangea

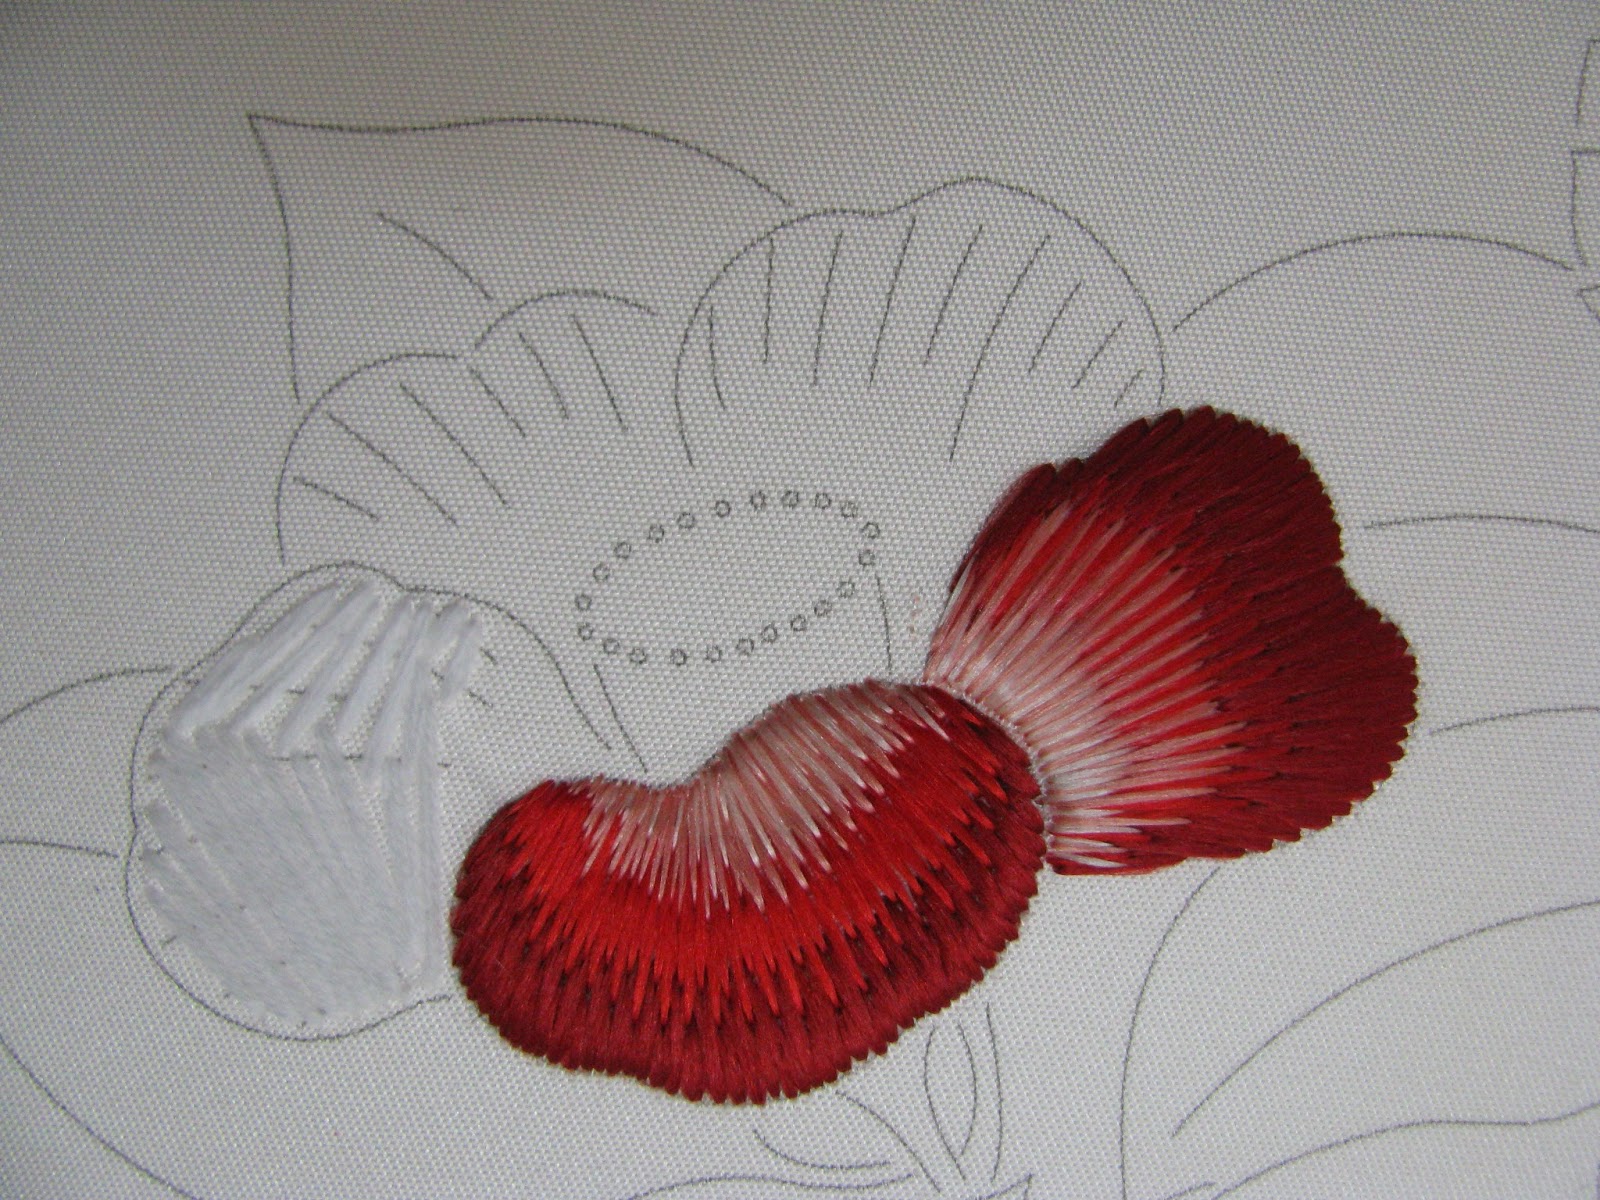
There is a bit of "sawtooth" for the edges of the two newest petals. I'll have to see if there is any way to fix it, short of taking it out. Maybe the leaves will help disguise it.


I mounted up the Summer Hydrangea piece, which came on the Tsuyushiba sha fabric.  I found out that "tsuyushiba" means dew-on-grass. On reading the box chart, there is a technique called "takeyamachi-nui" that is not in the instruction books. On googling it says "the weft is lifted following the warp and caught with a stitch leaving a gap and creating a kind of brick pattern". This sounds different from the box chart description which just runs the flat gold over and under, and will not create too much of a three dimensional effect.


It's a good thing I researched Japanese scrolls previously, as this piece has the ichimonji sections (upper and lower gold brocade strips) in ichimatsu (alternating gold blocks), and the side strips. From the color print out it appears that the piece has not been completed - some (not all) grass were worked outside the scroll picture, and none inside the scroll picture. The dews were not stitched either.
I can of course ignore the scroll parts and the grass, but since these are in flat gold and flat silver, it may be fun to do them. I'll have to ask my teacher about this.

Saturday, July 13, 2013

Camellia Petal

The side petal turned out quite acceptable. The biggest help was re-reading the Susan Steven's instructions.


My epiphyllum is blooming nicely. The flowers are as big as Coco's head. Two are in full bloom, one is fading, and the next one will open this evening. They are most fragrant at night.


Friday, July 12, 2013

Camellia Petal

I decided to redo the petal - for the third time. After taking the stitches out, I marked the stitch directions using couching thread - to see if it helps.


The first row turned out better.


Still not great, but this is it. I'll try to fill in some of the gaps where the background shows through.


Wednesday, July 10, 2013

Padded Camellia

Finished the petals of the first camellia, and started on the padded one. Should have made the stitches in the first row longer.


So to make up for it, I made the second row long. It is not as neat as it should be, but I'm letting it stand for this petal. Hopefully the next row will cover up the unevenness.


I think I'll mount up the Summer Hydrangea next - maybe I'll work both pieces concurrently, for a change.

Monday, July 8, 2013

Camellia

I am not fond of this piece, so I find it  hard to get going and keep at it. For some reason the fabric is hard to work with, being stiffer than normal.


There is a little kink on the bottom right of the right petal. But I think I'm going to leave it alone, and call it a natural part of the petal. Did I mention I am not wild about this piece?