
Tuesday, December 31, 2013
Hydrangea Leaves
The leaves look nice with the veins in. This fabric (Sha) turns out to be really easy to stitch - as there are definite delineated rows, making weft foundation really a breeze to do!

Saturday, December 21, 2013

Saturday, December 7, 2013
Hydrangea Leaf Bicolor
The leaf with SSH before the veins - I got lazy and didn't do the SSH for the lighter portion - but most of the lighter green is less than 1 cm:

After the veins:


After the veins:

Wednesday, December 4, 2013
Hydrangea Leaf bicolor
I tried several different approaches to the hydrangea leaf. This was one when I intended to use a blending thread to cover the shared hole of the 2 colors on the right side. It did not turn out well; the colors are too different and being flat silk instead of twisted it became very obvious and jarring.

I replaced the lighter color with the next darker green called out in the box chart; even though this green is not of the same family as the dark green. I used the long and short stitch technique to add the second green. I can use the SSH to (hopefully) "blend" the 2 colors at the junction.


I replaced the lighter color with the next darker green called out in the box chart; even though this green is not of the same family as the dark green. I used the long and short stitch technique to add the second green. I can use the SSH to (hopefully) "blend" the 2 colors at the junction.

Sunday, December 1, 2013
Hydrangea Leaves
Couched the veins on the leaf. I was waiting for my order of YLI #100 silk thread to arrive to avoid making couching thread; even though the color of the YLI thread does not match exactly the silk - it is not obvious.
On the other hand, still not good with line of staggered diagonals, but it will have to do and hopefully it will get better.

On the other hand, still not good with line of staggered diagonals, but it will have to do and hopefully it will get better.
Saturday, November 30, 2013
Second Hydrangea Cluster done
The second cluster is done. It looks better than the first one - the round knots of the first cluster do not look even. I may consider re-doing them.

One of the leaves is done. It is not supposed to be fully stitched. I have not added the veins; these will make it look more "leaf-like". Started on the second leaf at the bottom, which will have 2 colors.


One of the leaves is done. It is not supposed to be fully stitched. I have not added the veins; these will make it look more "leaf-like". Started on the second leaf at the bottom, which will have 2 colors.

Tuesday, November 19, 2013
Hydrangea cluster
The flowers remind me of the other JEC Phase VII piece - Pansies. They are highly reflective and starting to look "holographic". It's a good thing the flowers are small - else they will be overwhelming. However they may work well with the striking ichimatsu border. I will have to step back and meditate on it when I'm ready to work on the borders.


Saturday, November 16, 2013

Wednesday, November 6, 2013

Monday, November 4, 2013
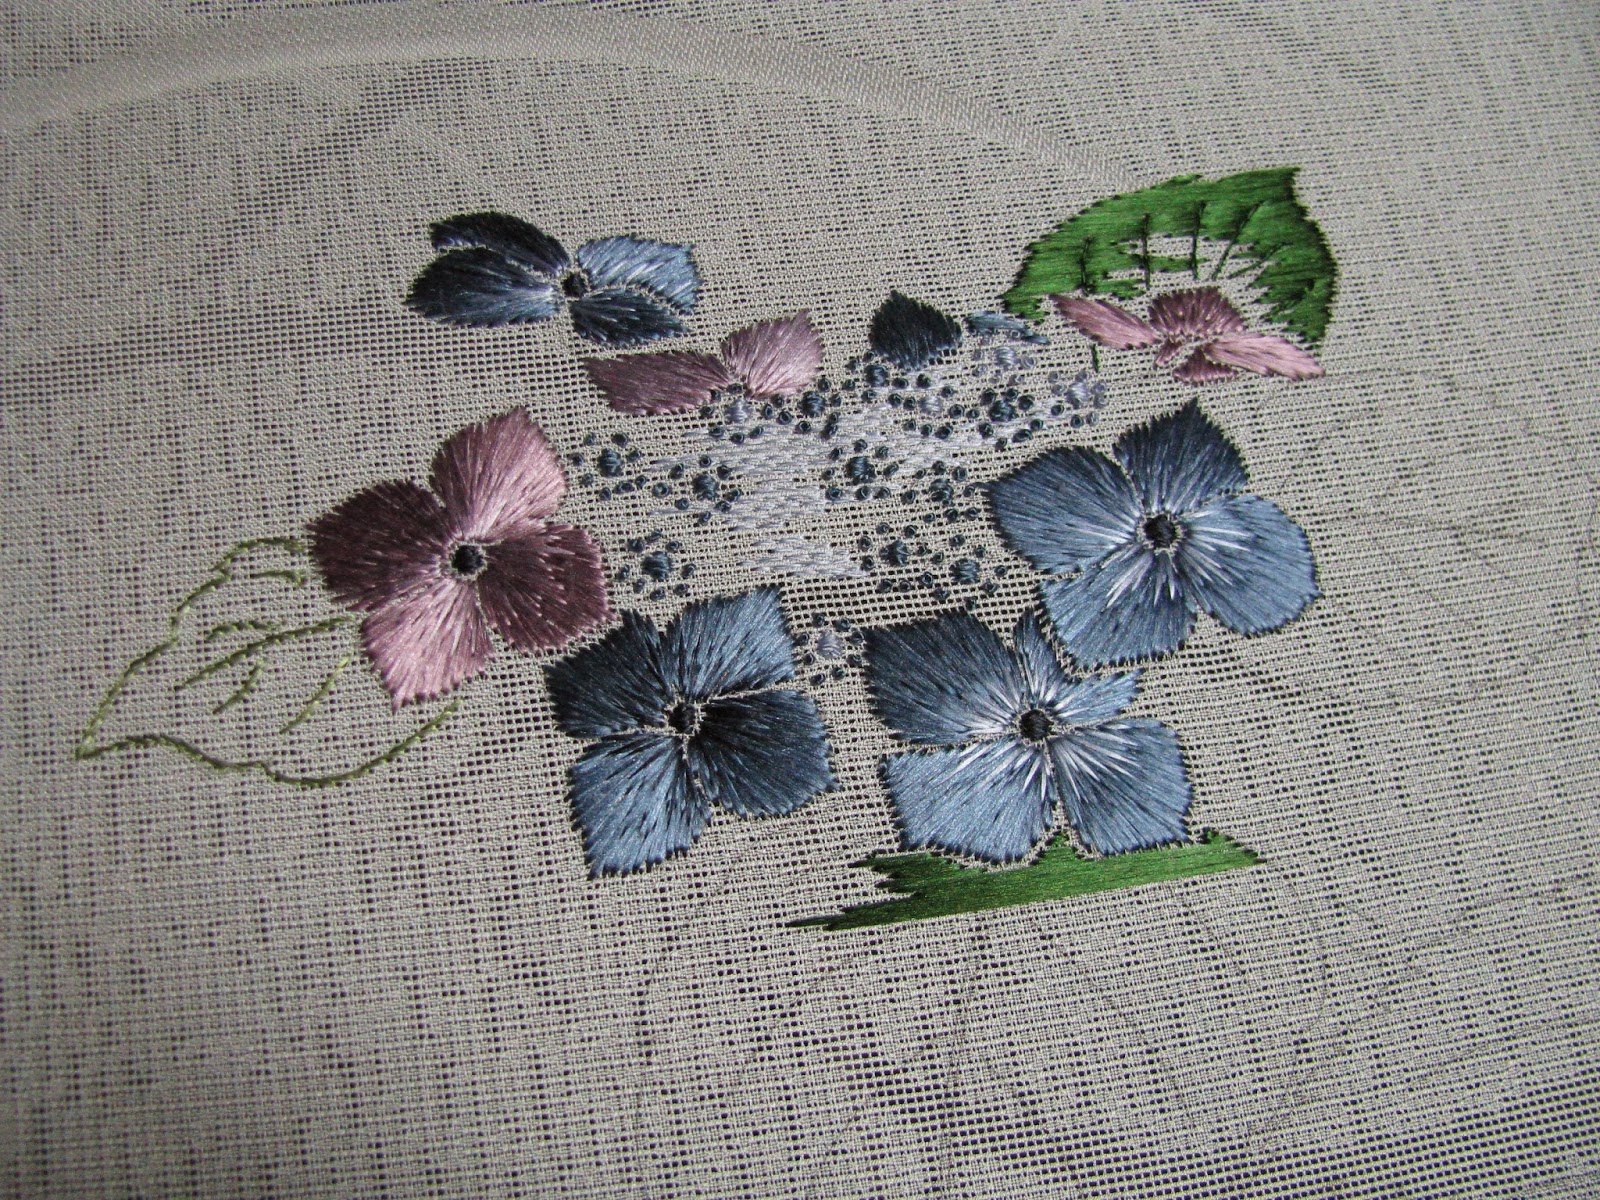
Hydrangea central flowers
The small central flowers of the hydrangea macrophylla were represented with circles and fuzzy effect, and the large bract like outer flowers (tetramers) were done with random realistic technique.

I was able to do some stitching using a small Ott light, during the recent wind storm that knocked out power for about a day. Not having access to the internet saved a lot of time!


I was able to do some stitching using a small Ott light, during the recent wind storm that knocked out power for about a day. Not having access to the internet saved a lot of time!

I started on the round knots around the centers of the tetramers. I used the "single hand technique" that Mary Alice taught me (and she learned from Midori) for doing the round knots. These turned out very nice and consistent.

Tuesday, October 29, 2013
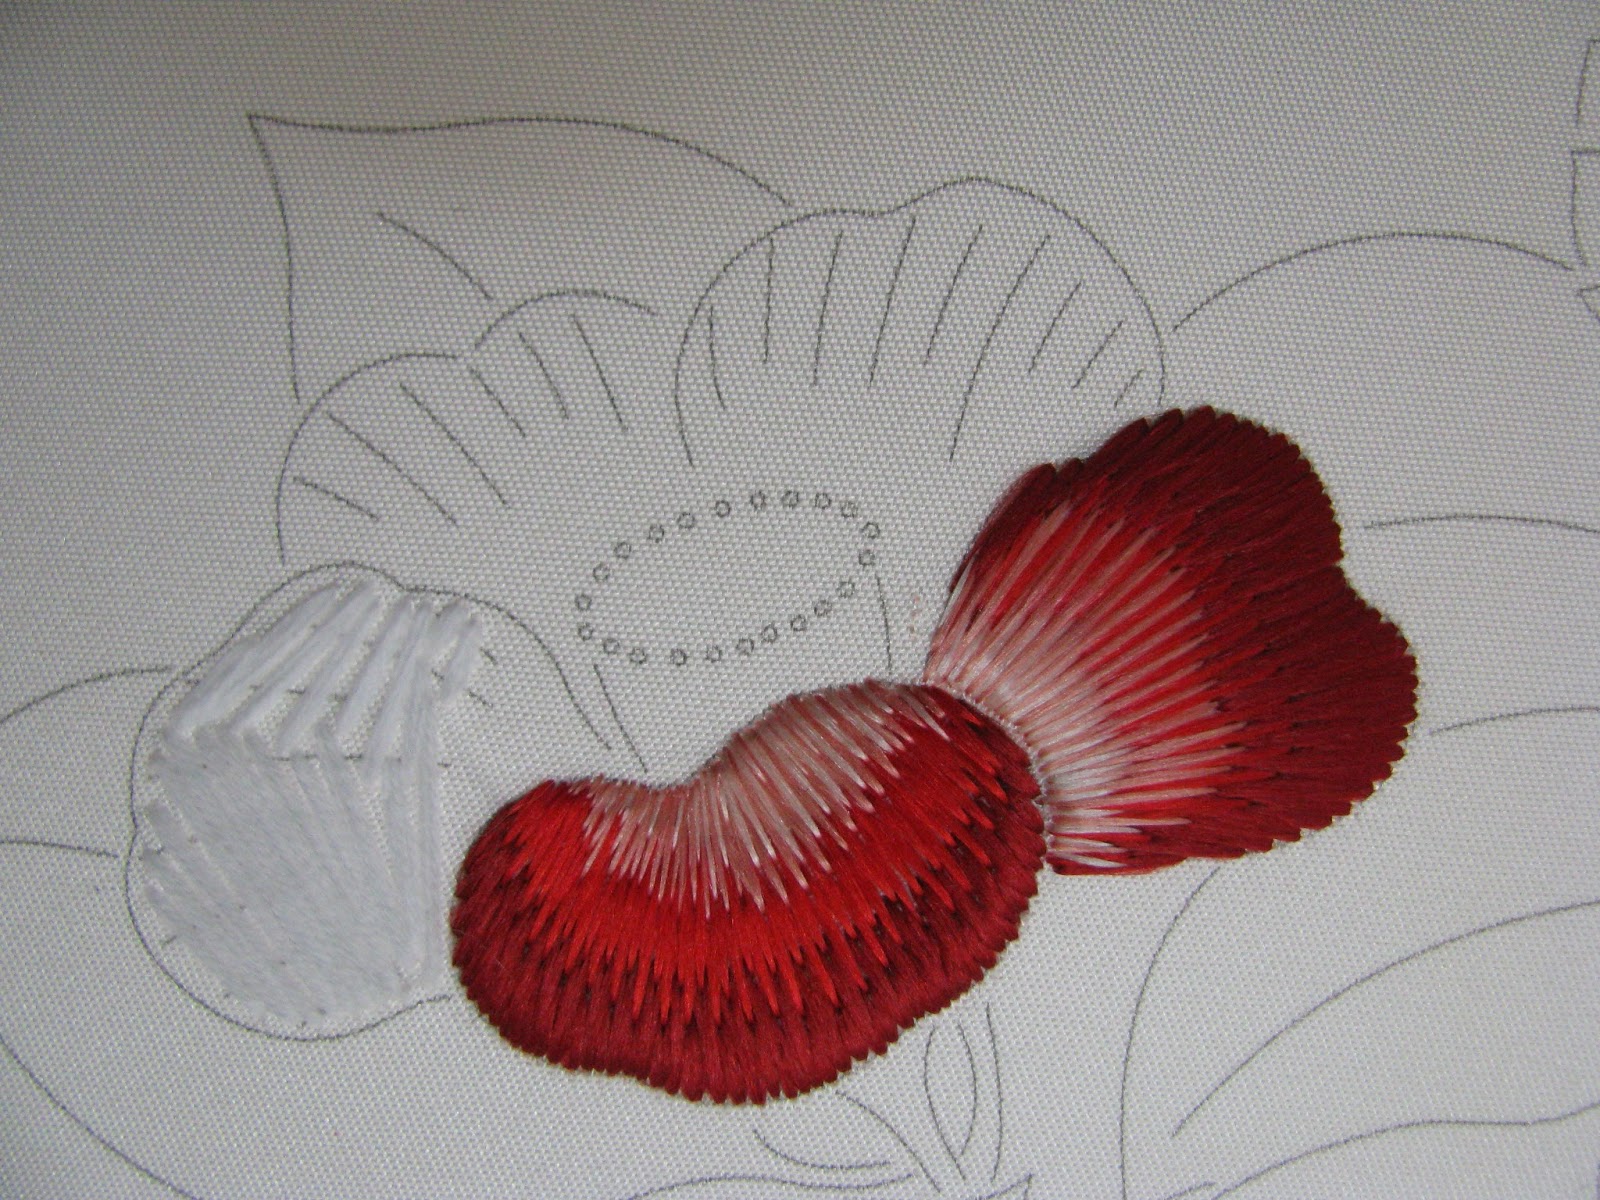
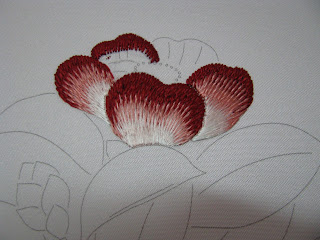
Hydrangea petals
I re-read the descriptions for Japanese scrolls, and realized that top flat gold section should be twice the height of the bottom flat gold section. I think the best proportions would be 3 rows at the top and 2 rows of checkerboard at the bottom. I will wait till the stitching is done before correcting the flat gold. Bummer!
Did a few more hydrangea petals.
The non-business end of my glass laying tool functions very well as a burnisher!

Did a few more hydrangea petals.

Tuesday, September 17, 2013
Summer Hydrangea scroll
Just got out of a four day class with Mary Alice Sinton. I worked mostly on the Hydrangea scroll as Camellia was well described in the French book. Mary Alice figured out what the ichimatsu (checkboard) pattern is that constitutes the chi (earth) section of the scroll (ichimonji-ge?). I made three rows of 7 mm grid squares with couching thread, to be filled with flat gold. Even though the ten (heaven) section of the scroll is not shown in the color chart, I think I'll do it with two rows of flat gold checkerboard - even though the ten is supposed to be half the height of the chi. I hope my interpretation is not too far from the true Japanese tradition. I looked at the JEC's Hydrangea piece again, and it is truly a scroll - it is listed as being 36 inches long. Fortunately I only got the 15 inch, so I don't have to (can't) finish it as a scroll.
As the fabric is translucent, I have to be careful not to let the threads show through from the underside.

I used about 2.5 strands of flat gold so far - and only wasted less than a quarter strand. It turns out really really nice!

I also did a few hydrangea petals and the flower centers.

Going on vacation in the next 2 weeks, so taking a break from stitching!
Saturday, September 7, 2013

Monday, August 26, 2013
Mottled Camellia
I finished 2 of the leaves and added short stitch holding (SSH) to the satin stitches. I used a 1/4 flat for the SSH as camellia leaves are smooth and shiny. Besides which it is easier than trying to do SSH with 1/2 twisted. They turned out really nice!

I started work on the mottled camellia.


I started work on the mottled camellia.

Saturday, August 24, 2013
White Camellia
The white camellia looks really good with the gold center. I must remember this design technique!
I decided to wait for class in several weeks before attempting the mottled camellia, as this is the most difficult one. So I started to stitch the weft layer leaf instead.

I decided to wait for class in several weeks before attempting the mottled camellia, as this is the most difficult one. So I started to stitch the weft layer leaf instead.

Friday, August 23, 2013
Camellia
Back to JE's Camellia. I looked at the work so far and they appear better than I remember. Amazing how they improve just by sitting there!
The white petals turned out well today.

The white petals turned out well today.

Sunday, August 11, 2013

Friday, August 9, 2013
Moth Orchid finished
I contemplated re-doing all the flowers to make them more to scale. I would remake them using a yellow color scheme, and save the purple petals for some small ornaments, maybe. Then I decided it would be much easier adding another stumpwork leaf, and some more roots, at the base

Detail of the base. Since the detached leaf was done on white muslin, I usually run a green marker along the cut edge so the white is not obvious. After looking at the detail, I removed the root that is sticking straight up next to the date. I'll take a final photo when it is framed.


Detail of the base. Since the detached leaf was done on white muslin, I usually run a green marker along the cut edge so the white is not obvious. After looking at the detail, I removed the root that is sticking straight up next to the date. I'll take a final photo when it is framed.

Wednesday, August 7, 2013
Orchid flowers done
The petals were stitched, cut out and assembled. I think the piece is a bit top heavy - I may have to add something at the base. Either more roots or some beads that represent orchid bark.

I happen to have an orchid that is in flower, so here's the comparison.

Detail of the flowers.

This piece has definitely cured me of wanting to do stump work flowers! Luckily I don't have any more purchased pieces that are similar.


Detail of the flowers.

This piece has definitely cured me of wanting to do stump work flowers! Luckily I don't have any more purchased pieces that are similar.
Tuesday, August 6, 2013
Orchid petals stitched
All the orchid side petals are stitched. There are still the three center petals left. Stitching these petals was very tedious; they might have cured me from doing any more stumpwork flowers!


Wednesday, July 31, 2013
Orchid petals
I am not fond of couching wires for stumpwork. The instructions called for couching the wire around a satin ribbon, and then cutting the petal out without any further stitching. I decided to use a purple silk fabric instead of the satin ribbon. However the silk fabric looks too dull, so I am stitching the petals instead.
These are the 5 petals for one flower.

These are the 5 petals for one flower.

Monday, July 29, 2013
Orchid leaves and buds
The big leaf and buds are done. I used the blister effect technique for the buds instead of felt padding.

The detached leaf is couched around wire. I took apart the wire bundle in an old lamp cord and these individual wires are just the right size to use in stumpwork.

The detached leaf is added.


The detached leaf is couched around wire. I took apart the wire bundle in an old lamp cord and these individual wires are just the right size to use in stumpwork.

The detached leaf is added.

Thursday, July 25, 2013
Orchid Stem and Leaves
The stem has a very nice curve, and the leaves are padded with felt. The roots look nice too. The big leaf will be filled with long-and-short stitches next.


Tuesday, July 23, 2013
Moth Orchid
I decided to take a break from Camellia and work on a piece I got several years ago. It is a stump piece called Moth Orchid from Luan Callery. When I ordered it I was just starting to do stumpwork, and I didn't feel I was ready to tackle it. I think I'm much more able to do this now. Also I got to try two new toys that I recently ordered. The first is the Pilot Frixion pen; the second is the mini hair straightener as suggested by Lois Kershner during the class I recently took with her.


For the backing I use a leftover upholstery fabric. It is cotton with a nice woven design. I traced the design using the Frixion pen. I tested it out and sure enough - the lines totally disappear when I hold a hot iron close to it. Very neat!
Then I straighten out the DMC thread using the hair straightener before I stitch with it. I don't know if it made much difference, but it was fun anyway.
Today's progress - the orchid stem:

Monday, July 22, 2013
Camellia flower
I fixed the sawtooth with half a strand of red and it turned out ok. I (almost) finished one camellia. The karayori pistils are left, which I'll leave for later.

I must see if there is something else I can work on concurrently, to relieve the pain I'm feeling with this piece!

I must see if there is something else I can work on concurrently, to relieve the pain I'm feeling with this piece!
Monday, July 15, 2013
Camellia, Summer Hydrangea
There is a bit of "sawtooth" for the edges of the two newest petals. I'll have to see if there is any way to fix it, short of taking it out. Maybe the leaves will help disguise it.

I mounted up the Summer Hydrangea piece, which came on the Tsuyushiba sha fabric. I found out that "tsuyushiba" means dew-on-grass. On reading the box chart, there is a technique called "takeyamachi-nui" that is not in the instruction books. On googling it says "the weft is lifted following the warp and caught with a stitch leaving a gap and creating a kind of brick pattern". This sounds different from the box chart description which just runs the flat gold over and under, and will not create too much of a three dimensional effect.

It's a good thing I researched Japanese scrolls previously, as this piece has the ichimonji sections (upper and lower gold brocade strips) in ichimatsu (alternating gold blocks), and the side strips. From the color print out it appears that the piece has not been completed - some (not all) grass were worked outside the scroll picture, and none inside the scroll picture. The dews were not stitched either.
I can of course ignore the scroll parts and the grass, but since these are in flat gold and flat silver, it may be fun to do them. I'll have to ask my teacher about this.
Saturday, July 13, 2013
Camellia Petal
The side petal turned out quite acceptable. The biggest help was re-reading the Susan Steven's instructions.

My epiphyllum is blooming nicely. The flowers are as big as Coco's head. Two are in full bloom, one is fading, and the next one will open this evening. They are most fragrant at night.

My epiphyllum is blooming nicely. The flowers are as big as Coco's head. Two are in full bloom, one is fading, and the next one will open this evening. They are most fragrant at night.

Friday, July 12, 2013
Camellia Petal
I decided to redo the petal - for the third time. After taking the stitches out, I marked the stitch directions using couching thread - to see if it helps.

The first row turned out better.

Still not great, but this is it. I'll try to fill in some of the gaps where the background shows through.


The first row turned out better.

Still not great, but this is it. I'll try to fill in some of the gaps where the background shows through.

Wednesday, July 10, 2013
Padded Camellia
Finished the petals of the first camellia, and started on the padded one. Should have made the stitches in the first row longer.

So to make up for it, I made the second row long. It is not as neat as it should be, but I'm letting it stand for this petal. Hopefully the next row will cover up the unevenness.

I think I'll mount up the Summer Hydrangea next - maybe I'll work both pieces concurrently, for a change.


I think I'll mount up the Summer Hydrangea next - maybe I'll work both pieces concurrently, for a change.
Monday, July 8, 2013
Camellia
I am not fond of this piece, so I find it hard to get going and keep at it. For some reason the fabric is hard to work with, being stiffer than normal.
There is a little kink on the bottom right of the right petal. But I think I'm going to leave it alone, and call it a natural part of the petal. Did I mention I am not wild about this piece?

There is a little kink on the bottom right of the right petal. But I think I'm going to leave it alone, and call it a natural part of the petal. Did I mention I am not wild about this piece?
Tuesday, June 18, 2013
Falling Stars and Field Mouse Framed
The frames arrived and I finished framing both pieces. I took the photos of Falling Star before the plexiglass is in place.
 Some details of the piece -
The Bugs:
 Right Reeds:
 Left Reeds:

The Fence - the picture doesn't convey the agony I went through while stitching it (it looks more impressive in real life):


The Bugs:


The Fence - the picture doesn't convey the agony I went through while stitching it (it looks more impressive in real life):

Tanja Berlin's Field Mouse, finally got the frame for him (his name is Pierre):

Back to Camellia now. Sigh...
Subscribe to:
Posts (Atom)